
Employment Page Editing Tutorial
Adding a New Job
Step 1: Translate you Word Document to HTML
- Open the Word document that you need to translate.
- Go to wordhtml.com: https://wordhtml.com/. No login required.
- Copy everything from the table to the end of the document. (You can skip the application instructions at the top if you want.)
- Paste the copied content into the "Word" section of wordhtml.com.
- Edit the pasted content to remove extra returns and fix the formatting of lists.
- Select all of the content and change the format to "Paragraph" under the "Formats" dropdown menu.
- On the right-hand side of the page (or the "HTML" tab on smaller screens), make sure that all of the boxes except for the bottom right one are checked. Then, click the "Clean" button. This will translate your Word content to HTML code.
- Edit the <table> tag so the job description will match the rest of them. <table> will need to be edited so it looks like <table class="skc-table emp-table">


- Copy the HTML code that is displayed in the white box. This code will contain the text of your job description, as well as some formatting information.
Step 2: Add the Job Description to the SKC Website
- Log in to the SKC website at https://www.skc.edu/wp-login.php.
- Go to the employment page. You can do this by navigating to it on the website or by typing the following URL into the address bar: https://www.skc.edu/employment
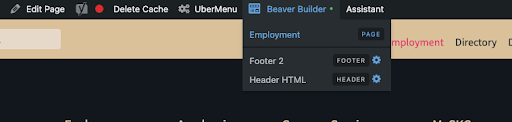
- Once you're on the employment page, hover over "Beaver Builder" in the black bar at the top of the window and select "Employment".
- Scroll down to the Available Positions section and click on the accordion.
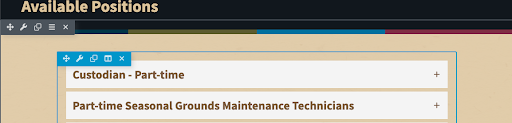
- A new pop-up will appear. This is where you can add, remove, rearrange, and edit the currently open positions.

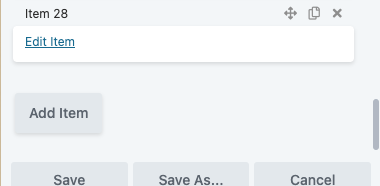
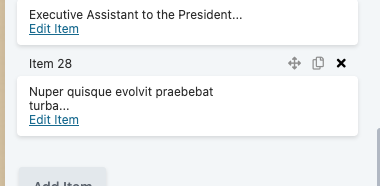
- Click the "Add Item" button at the bottom of the pop-up.
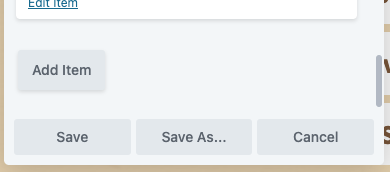
- Click "Edit Item" to open the editing dialogue.
- Enter the job title in the Title area.
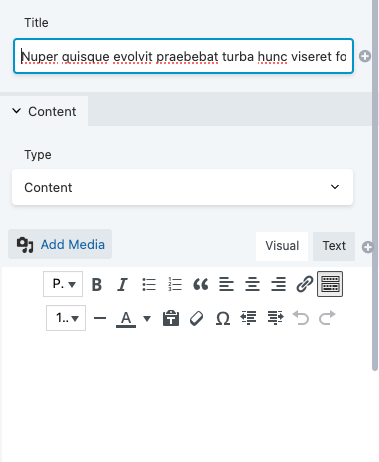
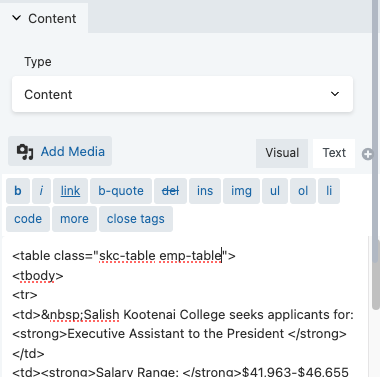
- Select the "Text" tab in the content area.
- Paste the HTML code that you copied from wordhtml.com into the white area below all of the tag buttons.
- Click "Save" to save the job description.
- Click "Save" to save the accordion.
- Click "Done" in the upper right corner of the window and "Publish" to publish the changes to the website.
Website Tutorial Menu
Employment Page Editing Tutorial Menu
Removing Job Descriptions
- Scroll down to the job description that you want to remove and click on the "X" on the right-hand side of that "item".
- Select "OK" to confirm that you want to delete the item.
- Click "Save" in the accordion dialogue, "Done" in the upper right corner, and "Publish" to publish the changes to the website.
Moving Job Descriptions Around
- Click and hold the "arrow cross" icon near the "X" on the job description that you want to move.
- Drag the job up or down the list to its desired position.
- Click "Save" in the accordion dialogue, "Done" in the upper right corner, and "Publish" to publish the changes to the website.
Editing a Job Description
- Click "Edit Item" for the desired job.
- Select the "Visual" tab in the content area.
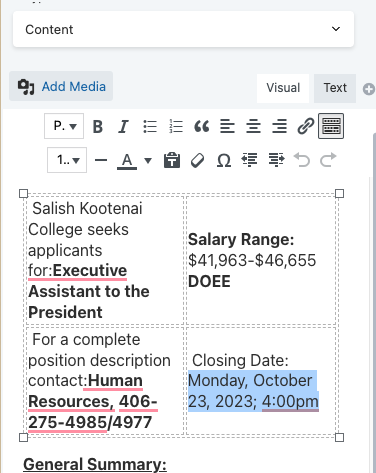
- Make whatever changes that are required.
- Click "Save" to save the job description.
- Click "Save" to save the accordion.
- Click "Done" in the upper right corner of the window and "Publish" to publish the changes to the website.